Sunday, November 29, 2015

Danger Danger

I added a warning to the last video I posted.  I foolishly cross cut my pieces without a sled and with a long length of wood on the non fence side of the blade.  This is dangerous.  You can easily get a kick back on the saw and was a dumb thing to do on my part.

That being said.  I am going to leave it up, with the warning edited in, as a show of what not to do.  I do not portray my videos as instructional in any way, they are only entertainment.  But I do not want someone copying this action.

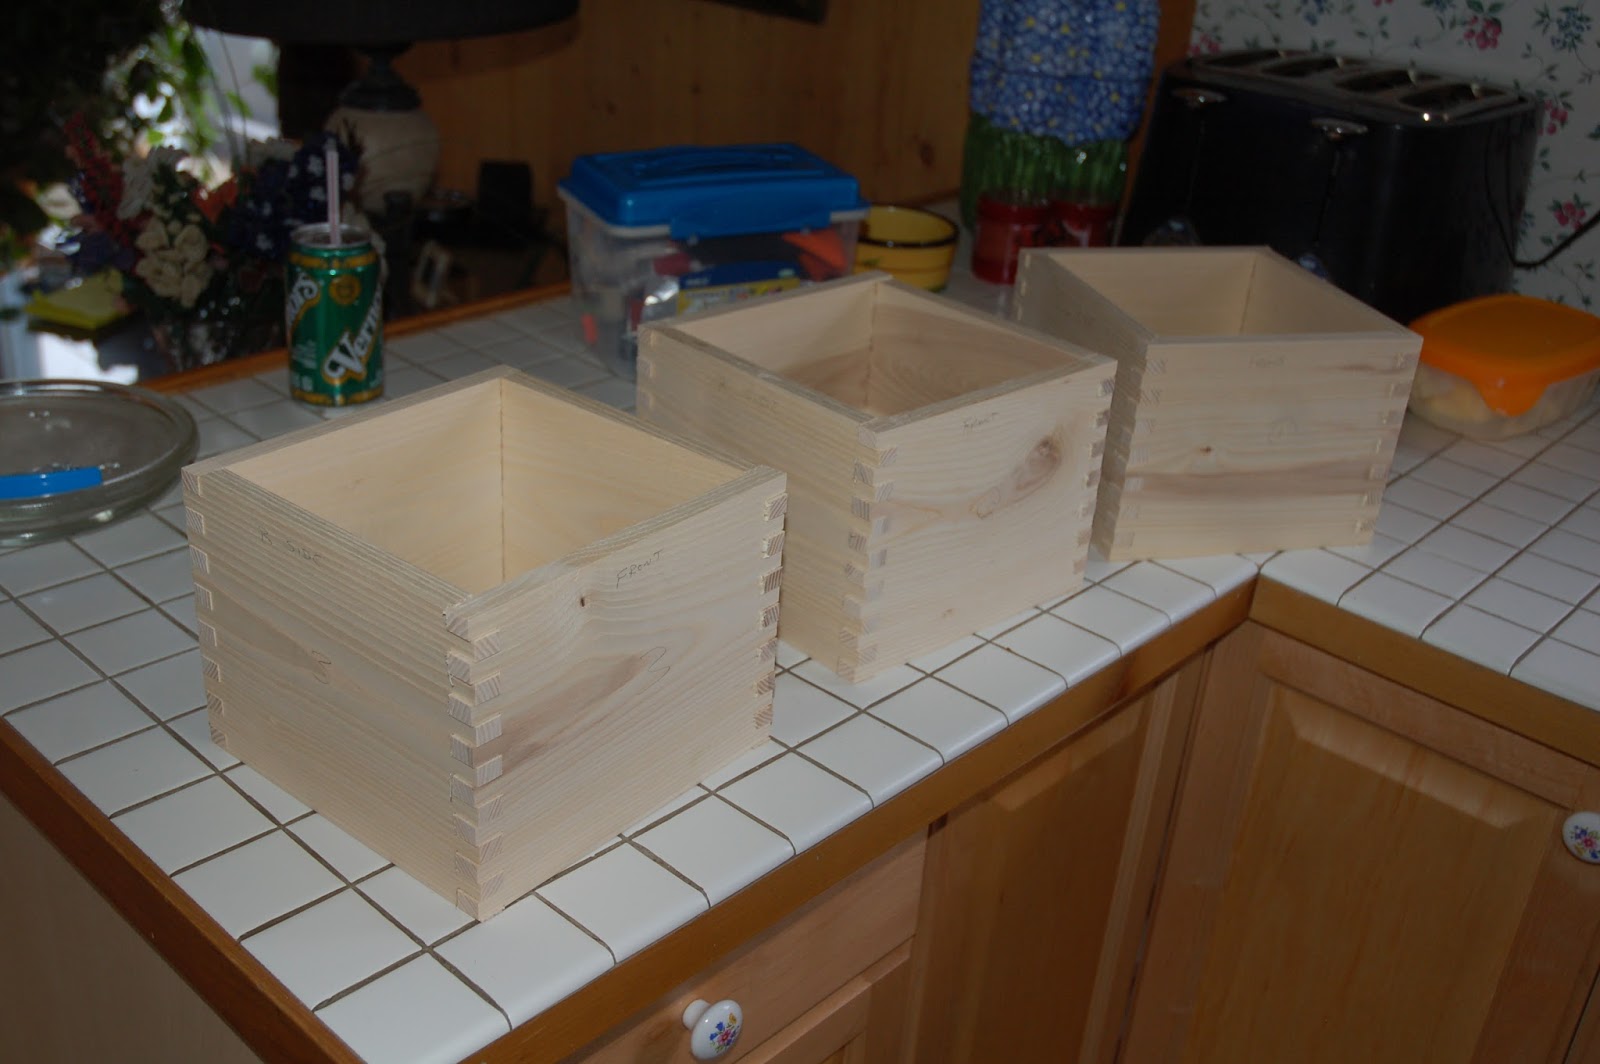
Now, onward.  I did get some more video editing up today on the trio of photo boxes.  I was trying to figure out the best way to flush up all the fingers to the sides and eventually got it.  Then I proceeded to cut the tops off the boxes.  They are still sitting in the shop like that while I have been working on the spice rack in cherry.  I have been using the Paul Sellers method of creating a "Housing Dado", also known as a Stopped Dado.  Except I do it with much less speed and talent.  I busted out a chunk of wood yesterday and then again today on the bottom piece.  So I had to stop and glue the piece back in and wait for the glue to dry.  I kind of gave up for the day after that happened.  What I do have complete fits pretty well though.  I did pretty good on getting the fit nice and tight on all 6 joints and test fitted them together.


After that I marked for the little piece that has to be removed so the front faces line up flush.


Then cut that little piece out and keep checking until happy with the fit.


There are a lot of markings to keep things sorted out on the wood, but it is going along OK.  Except of course, the breaking out of the chunks on the bottom that I have mentioned.

So, I took the bottom into the house and glued the little piece back on and decided I would edit some more video.  More on the photo boxes, this time figuring out the best way to trim all the fingers of the joints flush, and splitting off the top.  I am getting to like the wood direct off the plane instead of how it looks with sanding.  It is not as messy either.


I hope to get the hinges on tomorrow.  I could have given it a shot today, but I just was not totally in to it today.  I lost some ambition with the breakage.  So, until next time.....

Thanks for dropping by!


Saturday, November 28, 2015

Another box building video

I have had this one made for a while now.  I just never got around to posting it.  I have lots of footage to edit and put up but I have been spending time in the shop and gathering more instead.  I had to make some more top and bottom panels for a series of 3 boxes sized to hold some photos.  These are going out as gifts for Christmas.  I am having fun building and learning.


I got some time in the shop yesterday and today doing almost all hand tool work.  It is such a nice time doing it.  It was warm yesterday, but this morning was pretty cool, right around the freezing mark.  I fired up the heater and cracked the window for ventilation.  I have also suspended an inexpensive window fan to the ceiling joists, blowing down.  This helps a lot.  It was not long before I had to turn the heater to low and take off my coat.  Shortly after I just shut it off all together.  It will only get better as I add insulation over the winter.

I have a few builds on the go at the same time right now.  I also have some plans fermenting in my head for at least one more.  I am racing the Christmas dead line and I don't think I will get all of it done by then.

I had a centre punch come in today at Home Hardware.  It will be really handy for installing the hinges on the boxes and in other areas.


You simply set it on the hinge hole and tap the pin at the top and you get a mark right in the middle of the hole.  This should make installation much easier and more accurate.

Also, in some yummy happenings, Sally made her first Chelsea bun today.  It tastes wonderful and brings back lots of nice memories.  My Mom used to make it every year.  Sally really out did herself on this one.


About half of it has been enjoyed already.  

Well, I have tons of work and miles of video to edit, so until next time

Thanks for dropping by


Wednesday, November 25, 2015

More Power

I got the new extension cord to the shop today.  I am getting about 2 more volts, so that is a clear indication of less resistance.  It was not that hard as Sally did crawling around under the house to feed it.  I did get a couple of holes too many for the exit point, but that is a small matter.  I had to get as much length out of it as possible, and that turned out to be just right.  I am glad that job is done.


Thanks for dropping by

Tuesday, November 24, 2015

Keeping warm

As I have mentioned,  I bought a tank top propane heater to get me through until a proper solution can be installed.  I put it together today and got it running.  I like the unit, but I am sorely disappointed with one minor aspect of it.  I don't know who dropped the ball at Mr Heater, I guess it could have been Quality Control, or Engineering, but my favourite theory is that someone changed to a lower priced supplier and did not have the presence of mind to check if mind to check to see if it was a good idea.  Someone in the office, tried to save a few cents on each unit, trying to maximise profit and did not care about the customer.  A big blemish on an otherwise decent unit.  Here is how it went:


In other news, the upgrade to Windows 10 has done something to my Windows Movie Maker.  The sound was all messed up and I thought I lost my introduction sequence.  I figured out a work around for this video and got it posted.  Upon doing some reading, I figured out that I can change the compatibility mode to Windows 8.  We will see if that works on the next one.


Thanks for dropping by

Monday, November 23, 2015

Windows upgrade done

I guess I am still functioning on the internet.  I did the upgrade to Windows 10 today.  It went pretty smooth.  I went to a few sites on the privacy settings and changed a bunch of settings.  We don't have Cortana available in Canada yet, but I made sure that was off too.  I also re-set my default browser to Chrome.  I sign in and use G+ for a few things, including this blog and the You Tube channel, so it all works well together.  It looks like my Windows Movie Maker survived too, so that is a relief.  I had heard that it was a separate down load, but I guess since my 64 bit Win7 pro had it, it was included.

I took a short trip and filled the propane tank today too.  I have not hooked the heater up to it, but I have the option now.  Also, I went to the local Home Hardware and got some clips to hold the new extension cord.  They are designed for 1/2" PEX, but they clip on to the cord nicely.  I will have to use some metal strapping and make a couple of custom ones to attach it to the metal shed, but that is a minor thing.  I have an old inner tube that I saved from a wheel barrow that I can cut up and put around the cord where the strapping holds it.  Wednesday looks like the best weather in the forecast to put in the new cord.

So I have a little bit done, and set right up to do some more.  Let's hope the rest of the week is as productive.  Of course, I will be getting some video of the work.  I hope to have a couple more videos up in the next week.

Thanks for dropping by!

Sunday, November 22, 2015

The last vid from the second box

We had a great dinner with family at my sisters place for my Dad's birthday.  She cooked a huge spaghetti dinner and I think there were about 18 of us around the table.  The trip home was horrendous though.  It took about an hour and forty minutes to get there.  On the way home it started snowing hard and it took over 2  1/2 hours to get home.  I think we got a bit lucky in that we were behind a snow plow.  It may have only been doing 50 km/h, but it kept the road clean in front of us for most of the trip.  When it had to turn off, we just took it slow and easy, but it was still dicey in spots.  I think I did some snow plowing of my own with the front of the car.  We made it and were exhausted.  I did pause to snap a few photos though.


My Dad really enjoyed getting the box.  He turned it over in his hands and took in the joinery and everyone liked the book matched top.  Today I gathered up the last bits of video and strung them together.  The whole process got put up out of order so I could answer some questions, but I guess that is the way it goes.


So there you have it.  Another project done.  I am still working on the trio of boxes that you can see in the background.  I have some video of that too, but have not got to the point of posting it.  

My computer is telling me it is ready to upgrade to Windows 10.  I hope that does not give me any headaches.  I am not sure if the movie editing software, Windows Movie Maker, is going to be an extra upload or what.  I think I will give it a shot tomorrow.

I had to get the snow blower out today.  It had a bunch of trouble with the heavy wet snow clogging the chute, and of course I could not lay my hands on the silicone spray until after an extensive search.  First searching for my keys as I pulled the car out of the driveway and left them in there.  Once sprayed down it went a lot better.  I think the weather is supposed to warm up this week, so it will likely all melt.  I really can't complain.  It is getting to the end of November and I have seen a lot more snow at this time of the year.  

I still have to get the propane tank for the heater filled, and the new power cord to the shop.  Those jobs are pretty high on the priority list now, before there is more snow any way.  I bought the hinges for the box trio and ordered a self centring punch to help install them.  That should be in Friday, so between now and then I hope to get the cord in, the heater going, the computer upgraded, another video posted, and some more editing done.  Let's see if I get it all done.  Until then


Thanks for dropping by.

Thursday, November 19, 2015

Finishing follow up

On my "Bringing out the beauty" video, I showed a simple finish of BLO and bees wax.  I let it sit for about a week and then rubbed it out and applied a coat of paste wax.  I just finished making a short video of that.


Things are a bit out of order now on my videos.  I have to edit and post the rest of the build on this box.  I am also working on a set of boxes for other gifts at this time.  There is more editing and posting to do there, but I am slowly working through it.  After this set of boxes are done, it will be time to start something else.  This time, not a box.

In other news, I am on the "hurry up and wait" list for a bunch of things right now.  I am waiting for my new Bosch cordless drill to be delivered.  I also have on order a tank top propane heater for the shop from TSC.  You would think that they would have it right in the store, but I got a notice that it has been shipped to the store a couple of days ago.  Still no call.  I got a good price, but man are they slow.  I also ordered a 50 foot 10 gauge extension cord from TSC last Friday, and still no notice of shipping.  I am a little disappointed.  I discovered TSC years ago as a great supplier of goods and tools.  It seems over the last few years, they have grown and their service has suffered.  Their prices have certainly gone up though.  I don't know how many times it has been that I took the trip out of town to the closest store to take advantage of an advertised sale, only to find it not in stock.  I tend not to put too much faith in their flyers any more.  Speaking of which, they are a mess.  They have all kinds of partial sized add ons that are just a pain to deal with.

One other thing that I just learned I am waiting for.  I won a new Bosch 12" Glide Mitre saw!  I am in the process of sorting that out, but man, I am still having trouble believing this is happening.  I was thinking of the 10" version as a dream of something I would someday own.  This is THE mitre saw to have in my opinion.  I have been taken by it since the first time I saw it.  I am much more impressed with it than even the FeStool Kapex, which is way over priced (again, only my opinion).


  I am not a big FeStool fan in the first place.  I have no doubt about their quality, but they are just way too expensive for what you get.  I will be sticking to other brands I think.  You do not get twice the tool for twice the money they charge.  Now, there are a lot of fans of them out there, with cases of their stuff, and I don't begrudge them that.  For a hobby guy like me though, I would not get the return on the investment involved.  I guess that is kind of a rant on my part.

Any ways, there is some waiting going on for some exciting things coming.  New tools, new equipment, new projects, and the continuing shop build.  The weather has been pretty good, but winter is on it's way.  The shop still needs insulation and the electric work but the budget has no room for that right now.  I hope to start picking away at more shop build stuff and projects in the new year, but it is yet to be seen how that progresses.  So, until next time....

Thanks for dropping by

Monday, November 16, 2015

The second box is finished

Finally.  A nice sunny day today.  The last few days have been pretty dreary with rain and cold, I didn't get anything done.  The weather just kind of took my ambition away.  There were things I could have, perhaps should have been doing as I am making a run of 3 boxes while waiting for the finish on my second box to dry.

My plan was to put a coat of wax on it right away, but, on some good advice, I let it sit for about a week.  Today I did a whole lot of sanding on the trio of boxes I am working on.  All 4 sides, and the top and bottom panels.  They are all made from ash, and that takes a bit of time to sand.  It is all "priliminary" sanding again.  It is much easier to sand the insides before they are put together.  I started with 80 grit on the Random Orbital sander, switched to 120 grit, then some hand sanding with 180 grit.  I did touch the outside surfaces a bit on the finger joints, just to clean them up a bit and get the fuzzys off them. This will keep them from interfering with the glue up.

I am not totally happy with my dado stack for the table saw.  The corners cut a little deeper than the bottom.  A better set is on the wish list, but they cost a bit.  The set I have were pretty inexpensive, so another case of "you get what you pay for".  I will make due for now, as always.  I certainly not going to let it stop me!

I guess the finishing mood kept on for a bit because I decided to give box 2 a rub out.  I was not sure at first whether I was going to put wax on it or not, but I did.  Just because I was curious.  It didn't make a big difference, but it did make some.  The biggest difference is in how it feels.  Wow.  It feels so nice.

This is the same box I did my simple finish video on.  I got my first "thumbs down" on that one.  I guess some folks have to grumble.  I have not really shown the whole thing, this one is a present.  It is going to my Dad (who I hope is not reading this)  who will be 91 at the end of the month.  I really cannot think of anything he needs or would want.  I figure that every one needs something to put things in.  Letters, wallet, watch, photos, and little things that you want to keep in a special spot.  The sides are of ash, again the same tree that my guitar came from.  The top and bottom panel are the book matched maple I rescued from the fire wood pile and make the video on.  I really liked making it.


So, there it is.  A lot of work and time and I liked it so much I started the other 3.  Like I said they are all ash, the top and bottoms from the guitar tree, again gifts.  They are designed to hold photos and I will be doing some glue up tomorrow likely.  They are for gifts too.  I have a couple more things I would like to get made before Christmas, and they are NOT boxes....lol.  Stay tuned and we will see how it goes.

In other news, I have a propane tank heater for the shop on the way.  I will have to buy a propane tank and fill it now.  I have a 50 foot 10 gauge extension cord coming too.  This will power the shop for the winter.  It will be plugged into a 20A circuit and will be much more up to the task than the 3 cobbled up lighter gauge cords I am using now.  I am still waiting for my drill from BTP forum,  it has been a month now and I expect it to be at least a couple more weeks.  I am excited about that too.

Thanks for dropping by!

Friday, November 13, 2015

Bringing out the beauty

I have seen this finish in a lot of places.  I decided I would give it a shot, and I am really pleased.  I would not use it for a hard wearing application but at the same time, I would not hesitate to use it on drawer runners and such.  It is very easy and I don't think the ratios are too critical.  If you use mineral oil instead of BLO then it is food safe and can be used on butcher blocks and salad bowls and such.  I think I may have found my "go to" finish for projects.


I hope you enjoy it and.....

Thanks for dropping by

Thursday, November 12, 2015

More on the box

I am getting slowly caught up with editing and posting video.  Here I use the router bit that broke to make some grooves for the bottom panel.  The panel is one from a previous video, made of maple and book matched.  I used my Record 078 for the first time.  It started off kind of slow, but I am getting better and will continue to do so with more practice.  I am pretty happy with how the tool functions.  I hope you find this enjoyable!


Thanks for dropping by!

Tuesday, November 10, 2015

2 for 1

The weather has been rather nice lately.  So nice that I have been spending more time in the shop.  Along with being out in the air with Sally and Lil' Lee.  I have had the camera in the shop too.  Which of course means I have lots of video clips saved, and nothing published for a while.  Well, it rained today, so I took some time to do some editing and catching up.  We had to go to town so Lil 'Lee could get her grooming done, but other than that, I have been sitting in front of the computer.  I have not got it all done, but I got 2 of them, and posted them both today.

The first one is figuring out the sides for the bottom of a box, letting the sizes of wood dictate to some degree, and getting some more practise with the hand plane.  I got all the box joints done for the bottom, and I am pretty happy with the new fence/dimension of the jig.  It was difficult to edit this one, as I waited so long between doing the work and checking the footage.


The second one I did up took place before the "Cheap Router bits" video.  It is going through trying to set up that damn router.  I feel like using a string of profanity dealing with it sometimes.  But, it is the only one I have, so I have to deal with it.  

I am a member of the BTP (Be The Pro) forum and collecting points there.   The points you collect can go toward various items there, and as the site is sponsored by Bosch, their tools are some of the items.  I have already redeemed some points and have a cordless drill heading my way.  Not bad for being an active participant with a whole lot of nice folks that are well informed in their trades.  I think my next goal is to get enough points for a new router.

Here you can see some of the difficulties that I have with the old router.  Stuff that on most videos, gets edited out.  I think it is important to show that even though you face some difficulties in the shop, you should not be deterred from your goal or your project.  I, like everyone else, have hurdles to leap.  I just choose to make no bones about it happening to me.  Television is famous for editing out stuff and getting whole rooms or even houses built in a half hour segment.  It is unrealistic to think that things will just fall into place without any effort.  If it did, what would be the point of trying?  As is often the case, it is about the journey to get to the destination as much as it is the final outcome.  I keep trying and learning, all the while making notes of where things need improvement and where things need changing all together.


So, no matter that life is just not a cake walk.  You just keep on toward your goals, going over and around obstacles in your way, and sometimes taking a detour to get there.  Enjoy the place you are in for what it is.  A time to look around and enjoy the scenery.

Thanks for dropping by

Thursday, November 05, 2015

A bit about bits

I posted a new short video on You Tube.  I bought a set of router bits that were a store brand when they didn't have what I wanted there.  They were advertised as carbide edged, and they were.  The shanks must be pretty cheap steel though as it busted below the cutters.  I was not impressed.


The folks at the store are good people and they refunded me with no problem.  I ordered a Freud bit and it should be in tomorrow. 

Now, don't get all anxious about my safety, or lack of it.  The bit does not cut through the wood and the wood covers the bit.  I usually use a push pad, but in this instance, the feather board is thicker than the stock.  I did try on a piece of scrap when I was setting up, with pads and no feather board, but the piece wanted to jump around off the fence and if it did the bit would then be exposed.  So I decided that the feather board holding the piece in place was the safer way to go.  More control was, in my opinion, a lot safer.  Others may choose differently, and I would not argue with what they feel more comfortable with.

This morning I got up and wondered what I would do, as I wait for the new bit to come.  I went out and cleaned up a bit and as Sally wants a box to put photos in, I decided to get a start on that.  I messed a bit with some paper and pencil trying to get it to look right, but could not get what I wanted.  The proportions I needed, along with the thickness of the stock just was not working in my head and eye.  So instead I divided the project up.  I took one of the ash boards my friend dropped off to me and cut it by hand to rough lengths, hand planed the cup out of one side, and milled it on the thickness planer to 1/2".  I then jointed one edge, then ripped it slightly over sized on the table saw.  I then took the wood and cut it to the lengths I needed, keeping track of the order they were cut. 

Again I got to use my box joint jig, and cut many of them.  I kept the order of the board in tact so that the grain follows the box around, except, of course, the last corner.


There is still a lot of work to do, but I think they are coming along nice.  Again now, I am waiting on the router bit.  I have to cut grooves on the inside to hold the top and bottom panel, much in the same way the maple panel is in the box in the previous post.  Once this is done, I will sand the inside faces and glue them up with the top and bottom panels, making a cube.  After that it will just be a matter of running the box through the table saw, releasing the top from the rest of the box.  I will be using hardware on these for the first time.  Some hinges and maybe a knob and there could be some sort of lid stay put on too.  I really have not made up my mind.  All four of the boxes will be getting the oil and wax finish.  

All of these could find their way under the Christmas tree this year, and I am having a bit of a dilemma on what to post and where.  I don't want to spoil the surprises, but it is what I am working on and if I don't post about it, I have nothing to post.  Hopefully close friends and neighbours will not read my blog....lol.  That must be a first.  A blogger NOT wanting someone to read his musings.

Anyway, until next time

Thanks for dropping by!

Tuesday, November 03, 2015

Bottom of the box

Well I have been slowly picking away at my little box build.  The weather the last couple of days has been just beautiful.  The beginning of November and wearing a T shirt and no jacket.  It sure is nice.

I showed in the last video about bookmatching the panels for the top and bottom of the box.  I decided to get the joinery on the sides done up, and that went relatively smooth.  I do all the testing on cut off pieces just to make sure and once satisfied, I milled up the box joints on the sides.  They fit together well and I was satisfied.


Once that was done it was time to make the grooves for the bottom panel to fit into.  I decided about the only way I had to do this effectively was to use the Router.  It is not so great of a router,  an old Craftsman that I got from my Dad with a bunch of bits.  It must be about 30 years old, with a single speed and a 1/4" collet.  I did have a 1/4" straight bit, so I put that in and tried on some off cuts to test the set up.  That did not go so well.  The old bit gave up the ghost and a small piece of the carbide chipped off.


I looked on line at my local hardware store and figured it would cost just under $30 to get a new one made by Freud.  I like their products.  I went today to see if it was in stock, and it was not.  So I ended up buying a set of the store brand bits for about $50.  A bit more expensive and not the brand I really wanted, but I would guess that a few more of the ones I have need replacing too.  One thing about sets of router bits is that you usually get only a couple you will use and the rest sit in the box.  This set are all pretty commonly used ones, and the only way that I could get the bit I needed today.  Once I got it all set up it went pretty good.  I had to do some minor clean up with the chisels, but that was expected.

Then it was on to fitting the panel.  I cut it to size, allowing that it had to fit into the slot.  I then got my Record 078 and put a rebate (rabbet) all the way around the panel.  It was a bit of a chore, but an enjoyable one.  It will take some time to get used to the tool, but I will keep practising.


With  the milling done I tested the fit and it all seemed to be good.  So the next step is to put some finish on the panel.  It may seem premature at first, but the wood will move with the seasons, getting wider and narrower with humidity changes, and if I waited until it was together, I would not be able to get the finish to the edge and that edge would show as it moved in the slot.

I decided I would try a new to me process.  I mixed 3 parts of boiled linseed oil (BLO) and 1 part bees wax while on a small heating unit.  Upon applying it to the wood the grain popped out and it took a wonderful colour.


I may have found my favourite finish.  It has a wonderful sheen to it too.

With that done it was time to glue up the panels.  I really need a better clamping solution, but as I write, it is sitting on the kitchen table drying.


The top of the box will be just the same, only larger so as to slip over the bottom.  You may notice the painters tape in the corners to catch the squeeze out and make clean up easier.  So now I have to make the mate to this piece, following the same procedure.  Hopefully a little more efficient and in better time.

Thanks for dropping by.