Friday, May 29, 2015

On the edge


That makes that edge look better.

How's that for a short post?

Thanks for dropping in!

Thursday, May 28, 2015

Completely floored

After a bit of time taking it easy because of the rain, and because I needed it, I thought it would be a good day to get the floor done.  I went around the floor framing yesterday with a combination square set at 5 1/2" marking all the joists.


This is the thickness I need for the Roxul mineral wool batts.  I will have more insulation in the floor than the walls, but the difference in price between the R 14 Batts (for 2 x 4's) and the R 22 batts (for 2 x 6's) was so little it just didn't make sense to put the smaller ones in the floor.  You can also see the little arches I drew on each joist indicating the crown of the board.  I made sure all the joists were installed with the crown up.

The next step was more pest control.  I heard that critters and bugs don't like Borax, so I bought a box of it for about $7 and spread it all under the floor.


Now we are ready to start insulating.  I don't want the batts to fall through the joists, and they probably wouldn't, being friction fit, but I wanted to make sure.  We attached landscape fabric to the joists to hold the insulation up to the bottom of the sheathing.  It is breathable and supposed to last 15 to 20 years when buried, so I think it will do a good job.  


We worked from one cavity to the next, rolling the fabric over each joist and inserting a batt.


We kept on, slowly emptying the garden shed where I had stored it.  You could barely close the door when it was all in there.


After all the cavities were filled, we put down 6 mil vapour barrier, taped with Tuck Tape (a brand name of a tape designed for house wrap and vapour barrier).


Then it was time for the sheathing.  It is all 5/8 Tongue and Groove plywood.  I put some scrap pieces on the outer joists to help line things up and started with the first sheet.  This was an error and I should have started the sheathing 1/2 way into the first joist's thickness, but I didn't find out until I started the last row, and there is no way I was going to take out all those screws.  Anyway, the first sheet went in and I was pleasantly surprised at how square the framing was.


Yes, I used a tape measure for every screw.  I don't trust my eye as I don't do this on a regular basis and this is likely going to be the finished floor, with just a coat of paint on it, so I wanted the spacing to be fairly even on the finished product.  Speaking of screws, they are all 2 1/2" ACQ rated deck screws and I don't know how many there are, but maybe I don't want to......hundreds of them.  This was the first time in a long time that I took a battery off the charger, used it all up, and returned it to the charger in the same day.

So, the end product....


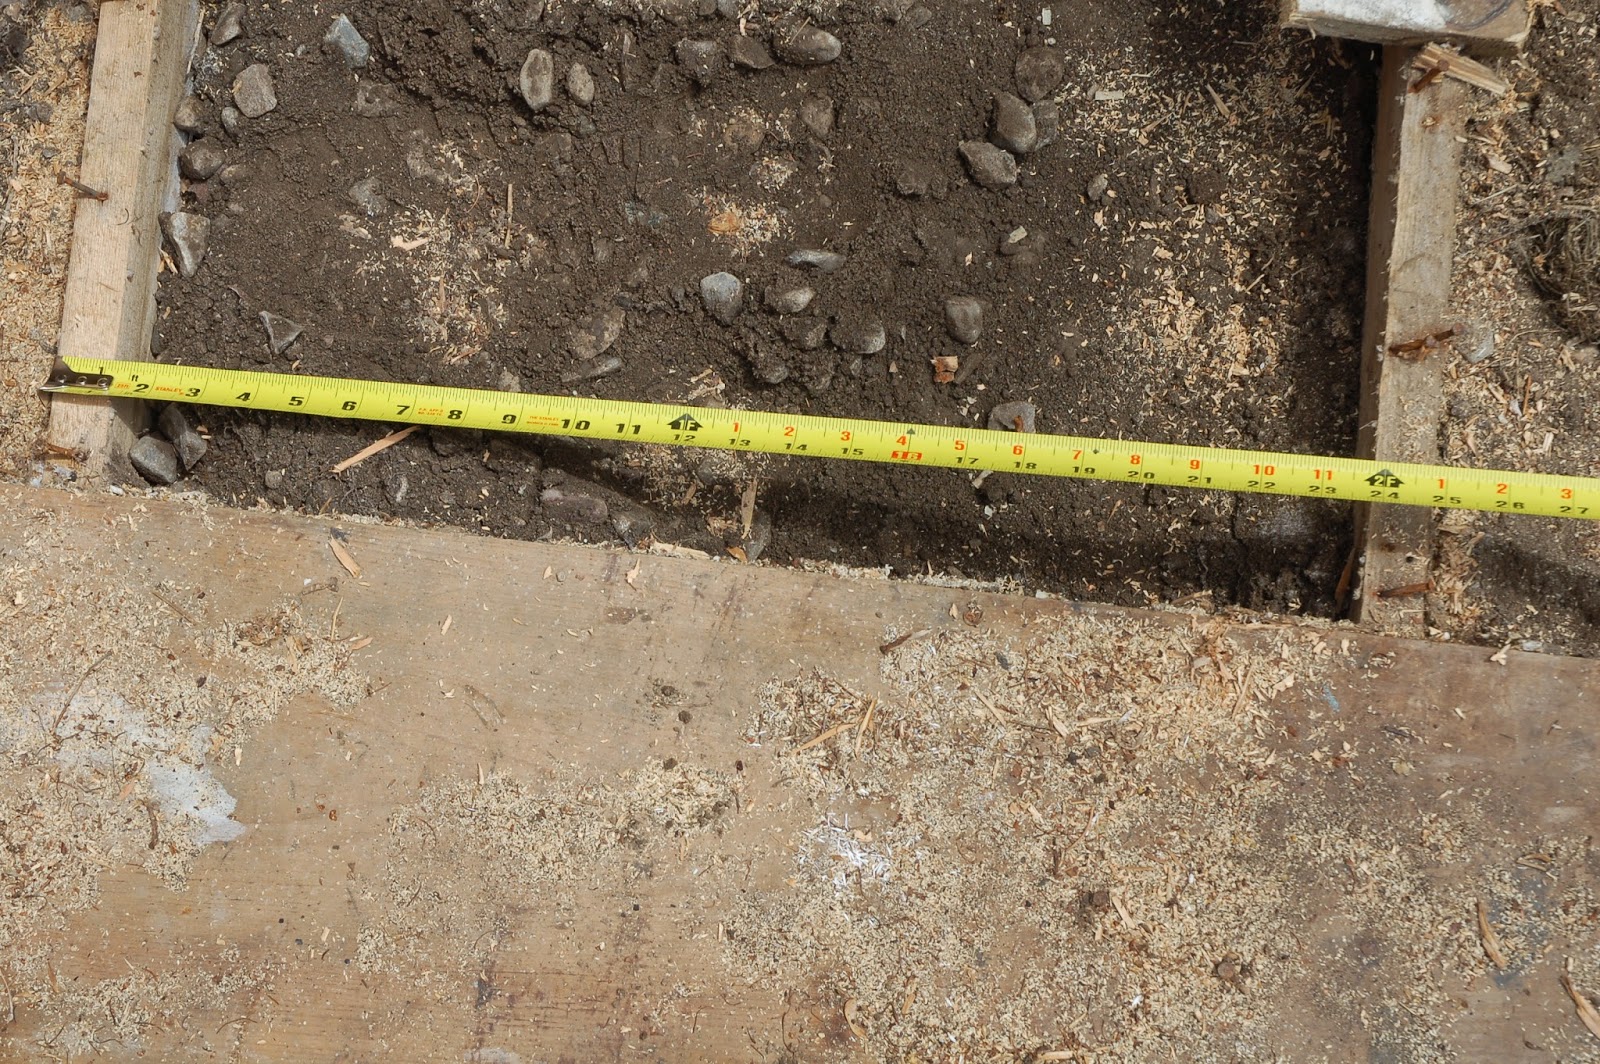
Good enough to dance on.  As for the spacing mix up.  On the side I started, it is great.


On the far side though, a bit shy of the mark.


I have a 4' piece that is left over.  I will set up the table saw and rip some filler strips to put in there.  It will be under the wall, so not an extreme mess up.  All the sheets are put down so the seams are offset by 4' and I am pretty happy with how it turned out.  I have a strong, safe, level and square floor.  I am also extremely tired.  I also have a perfect place to make a life size jig to make all the rafters, which is next.  A job that I have little experience at, but I think I can figure it out.  I have been studying.  I also went out and bought a new square and some buttons for laying out rafters.  That will be next, well right after I put in the filler strips.  Sally and I are going out to yard sales on Saturday, so we will get back to it after a bit of recovery.  Until then

Thanks for dropping in!

Tuesday, May 26, 2015

A tiny bit more

We went out for groceries today and I didn't expect I would do anything today.  I was wrong.  I spent a bit of time cutting the blocking for the floor and installing it.  The weather is really warm at 28 degrees (yay, no snow to shovel!) and the humidity is making it feel like 34 degrees.  So not a good day to over exert yourself.

I have still not decided on what to do about the door.  I went to the Habitat for Humanity ReStore in Goderich while we were there and didn't find anything that inspired me.  I may just make the door(s).  Just in case I do go with a double door (I am leaning toward double 30" doors) I put an extra piece of blocking in to reinforce where a sliding bolt would go into the floor on the secondary door.


Not much, but it is progress......

Thanks for dropping in!

Sunday, May 24, 2015

Almost floored.

I ran out of material today.  Perfect timing.

I started out moving a bit of gravel around.  The base was level and square when we left it last and remained so.  A bit of raking and shovelling was all that was needed to get the inside of the base how I wanted it.  I then took a roll of 1/4" galvanized hardware cloth.......


....and ran it around the inside perimeter.  I attached it to the base with galvanised fence staples and threw some scrap side walk slabs on the inner edge.


It will take a pretty ambitious critter to burrow through the 3/4" crush gravel all the way to the middle of the shed.  I am confident that it just isn't going to happen.

So, I was ready to start framing.  I had all the wood pre cut and a framing nailer I have never used.  It went pretty well.  It took a few shots to start to get a feel for it.  If you hold it too tight and not let it kick back it seems to not sink the nail all the way.  So you have to relax a bit while using it and let the machine do the job.  I had a few misses and a few that I had to pound in after too.  All in all though, it saved me a pile of work.  It would have been a boring video putting the base together, but I cobbled this together of clips I shot over the weekend.


I am really sore, but happy as a clam (are clams happy?) at what is done.  It is sitting a lot higher than I wanted, but there is a low spot in the yard right in front of it that I am hoping gets a load of fill in the near future.  There is still some gravel to move around the outside, but that can wait and be done any time.

This is what it is looking like as I write this.


Once I got it all square I toe nailed it to the base.  Then I took one more step.  I bought a bunch of sealant some months ago.  It was really inexpensive at the ReStore, run by Habitat for Humanity.  Another of my favourite places to shop, good deals and the money goes to good use too.


I used about 3 tubes of it and ran a thick bead inside the framing where it meets the base.


Yes, I would agree that I am being anal retentive about keeping stuff from living under the shop.  But I have had this stuff for a while and it is about time it got used up.  This ought to help with any bugs that want to live there.  I don't expect to be able to get to this area ever again.  So a few extra steps doesn't hurt.

So, that was the last of the material I have on hand.  Tomorrow or Tuesday another load comes.  I can put the centre blocking in the framing, insulate it with mineral wool (critters and bugs hate that too, and dampness does not bother it), vapour barrier and sheathing.  That is apt to be the next post, so until then....

Thank you for dropping in!

Saturday, May 23, 2015

On the level

I got all the old shed down and the space cleared.  That was days and days of clean up.

Today I had a guy show up with a small tractor that has a tiller on the back and a bucket on the front.  In a couple of hours he had what would have taken me a week to do.  A bunch of levelling and spreading the gravel around a bit.  There is still a lot of it to do, but it is good enough to get some progress.  I guess I have turned the corner from taking things down, to building them up.

The 6 x 6 timbers are put in place, levelling and squaring as we go.  This is not by any means the final levelling,  just enough to get everything oriented correctly.


Once I was satisfied that everything was square and level I "locked in" the long timbers with gravel so they wouldn't move.


I still have a low spot, but the timbers are square and level and that is all I need for now.  It is then a matter of pre boring holes.  Two in each corner.  I already had the holes in the upper pieces.  Now I went the rest of the way through.


After the holes were drilled, I gently removed the short timbers with the upper part of the lap joint, applied a healthy amount of PL Premium adhesive, and put the short timbers back on.  Then I put one 1/2" x 5" galvanised lag screw in each corner tight, and another one left proud of the surface.  This gave me somewhere to attach some light ratchet straps and pull diagonally until both diagonals are equal.


I had to go back and forth between one diagonal and the other about 3 or 4 times before I got it to within less than 1/8", and I think that is close enough.  I then tightened up the rest of the lag bolts.  Now to let the glue dry.  Once it is, it will be pretty much locked into square and I can do the final levelling.  I have a bit of gravel to move to do that.  I hope to get that done tomorrow and a bunch of the floor framing done too.  I have a load of wood coming Monday or Tuesday that will be enough to get the shop built and closed in.  Busy days ahead.  I am going to have to be aware of pacing myself.  I over worked my knee already once on this project.  Pain and insomnia (because I worry) are counter productive, but still, I am enjoying the process.  More so now that things are going up instead of coming down.  

Thanks for dropping in

Wednesday, May 20, 2015

Logistics and shopping and boring stuff

Not much going on, yet still busy.  The shed is all down and cut into pieces.  I am taking a few days to clean it up now.  I was going to level the spot by hand and decided that was a dumb idea.  I am waiting to hear from a guy with a small tractor to come and do it.  He will be able to have it done in a couple of hours.

We went to London yesterday and I bought 4 windows for the shop.  They are 24" wide and 48" high.  Right now I am thinking a bank of 3 on the north 20' long wall looking over the river.  It will also give me that wonderful indirect north light in the shop.  Then I am thinking I will put one of them on the east 12' wall as I am thinking that will be the wall with the sharpening station and some sort of bench for when I do metal work.  I have a 10' wheel chair ramp that is made from aluminium that is 3' wide and pretty thick.  It is a remnant of when my step son was alive and in his wheel chair.  I am thinking that a piece of it will make an excellent work top.  The west wall is where the door will be.  Not sure what I am going to do there.  I would like to be able to open it up to 4', but not sure how I will divide the space up.  The south 20' wall will just be a solid wall.  At least with the windows bought I can lay out my framing.

I got to geek out on cameras with my son while we were in London.  I am looking at a Canon Powershot SX-60 HS.  It is a little pricey, but would be a one camera solution for me.  Lots of zoom, a good macro setting, and will do videos too with a stereo mic built in and an aux. mic in.  Something to think about anyway (like there wasn't enough already).  Went out for lunch at our favourite Chinese buffet place too.

While I was getting my windows, Sally found a shop next door that was kind of like a flea market/junk shop/consignment store.  Lots of neat old stuff, and I will be returning to it for sure.  I did find this:


A surface gauge.  It will come in handy for setting blades on the jointer.  Besides, it is just old and cool (like me !).

I did make up a "shopping list" of materials to get the shop framed and pretty much closed in.  I took that down to Rona and gave them a whole bunch of money.  I told them to deliver it Monday or Tuesday.  That should give me lots of time to get the base and floor framing in place, all nice and square and level.  I was thinking of getting it brought down on Friday, but I just cannot work at such a pace, and not having material here will force me to take a break and not go until I hurt myself.  Sally keeps telling me, but I have a hard time finding the "off" button sometimes.  So, until I hear from my tractor dude, I am just going to keep the burn barrel going with all the scrap wood and tidy up a bit.  Not enough changes to take pictures of.  So, until next time,

Thanks for dropping in!

Sunday, May 17, 2015

A short day

Did not spend a lot of time today on the shed.  I tilled the garden for Sally (she built the frame herself from PT landscape ties.  I cut them and she put it together).  She put 2 bags of peat moss in before I tilled, always helps with clay soils.  Then we added 20 bags of soil we got really cheap on sale at the local Rona.  She then went about planting the garden with the flowers we picked up at a nearby nursery.


She put in the bird bath that used to sit by my mothers deck.  She passed away last year and it makes me feel like she is still close.

While Sally did her garden , I went through all the floor joists and marked them for crown.  Which was kind of hard on some.  There were some pretty straight pieces in the pile.  I then cut them all to 11' 9" the rim joists making up the other 3" to 12'.  I stacked them all on my saw horses and treated all the ends with end cut preservative.  Which reminds me, I have to order a couple more boards for centre blocking the joists......


It's good to see those old saw horses I built years ago still standing up to the abuse.  I guess I made them pretty good.  In the background you can see the roof framing is off.  That happened yesterday.  One thing about poor construction is that it comes down easy.  I am actually surprised it didn't come down on it's own over the years.  I am taking my time and cutting pieces down into pieces that are more easily handled as I go and trying to keep it fairly clean too.

The shed is primarily supported by 4 x 4's in the corners.  Follow the horizontal 1 x 4 across the back wall....see it here?  It is just above 1/2 way in the window.


That passes over the 4 x 4 in each corner and is nailed into the top.  I pulled 2 nails from each side of that board, and about 5 nails 1 1/2" long on each side that was holding the OSB to the 4 x 4, gave the wall a half hearted push and it fell over.  So I cut it up a bit.


It is getting a bit cluttered way in the back yard.  I hope I can start getting it cleaned up soon.  Not much more to go now and there will be a cleared and level spot to start making something safe and weather tight.  I am still amazed I didn't go through the floor or have the roof fall in or something.

Thanks for stopping by!

Saturday, May 16, 2015

Tear the roof off the mother!

Now George Clinton I remember!

More mayhem and destruction.  I started by taking the tin off the roof.  Notice anything amiss here?


All the screws, and the holes that go with them, are in the valleys.  Right where the water runs.  They ought to be on the peaks.  I am sure the original construction is all reclaimed material.  I am not too cool with heights, or ladders, but we got it all off and put aside.  Now you can really see how flimsy the roof framing is.


Once I got that done I decided it would be a good time to check under the floors.  I had to take off layers of OSB, hardboard, vinyl tile, and plastic until I got to the original floor.  Looks like it was made out of 1" thick barn board.  Upon pulling up a bit, more surprises!


More 1 x 4's.....oh boy!  Also, they are laying perpendicular to the rafters!  The builder was consistent though.


They even kept the 24" spacing!  Yes, that is right.....1 x 4 at 24" OC with a 12' span.  Laying directly on grade with a nice warren of trails the ground hogs have made.

The burn barrel is going steady with the scrap wood.  I am a couple of wheel barrow loads ahead of it.  The lawn needs mowing.  Maybe tomorrow we will start putting up the pool, and tearing down more shed.  I think I will have a blank slate to start building on by the end of the long weekend.

Thanks for dropping in!

Thursday, May 14, 2015

It's all about the base

OK, I have never heard the song, but I have heard it referenced a lot.

I got all the half lap joint cut into the 6 x 6's today....which means I got a total of 4 joints cut.  Not a lot of work, but it is progress.  I made what I think is my best video yet too.


The joinery fits pretty good right off the saw.  Now I have to put it under the old shed and assemble it with lags and PL premium.  When it is laid out on the ground I realize how small it is.  Sally is saying it is huge.  I put the saw benches in and some tools to give some scale.


Not a huge amount of work done, but it was a bit heavier than I should be tackling, better to go slow than to have to stop all together.  I am very pleased with the progress so far.  Next is opening the floor of the shed.  I know the joists are terribly over spanned.  That is what the pressure treated 2 x 10's are for though, getting that floor beefed up and safe.  The weather guessers are calling for 4 days of rain coming, so I am not sure when progress continues, but it will and I will post then.

Thanks for dropping by!