I bought 4 windows a couple of weeks ago from a warehouse place. They were pretty inexpensive. The size of them are 24" wide and 48" high. I figured out how I am going to fit them into the wall, and created a plan for the framing. I also looked at the manufacturers web site for info on how to frame them. These windows have a mounting flange on them and I have never framed for them before. I was surprised when the call out for the rough opening was only 1/2" larger than the window size.

I am fitting them in so the right most king stud in the drawing sits where the regular 16" OC stud would fall. Then the next window will do the same where the next available stud would fall after the first window. So I have a short stud (Cripple stud I think) under each window.
I grabbed 6 full length studs for the king studs and laid them out on the floor.

I also made note of the crown, as usual

After that I set up the mitre saw on it's stand. There is a small bar that the instructions say is to help keep long pieces square to the blade, but it is also handy as a stop for repetitive cuts.


Once I had that set up I cut all the lower jack studs.

Then the ones that go on each side of the window.

After adjusting for the horizontal members I cut the sills and the 2 x 6's I will used for the header (lintel) over the window.


With that all cut I could move on to the next part of the headers. The overkill part. I ordered a couple of sheets of 1/2" plywood when I made the order. The two 2 x 6's laminated together are only 3" thick and the 2 x 4 wall framing has a nominal thickness of 3 1/2", so the plywood makes up the difference, and adds tons of strength to the header. I marked out 5 3/4" width on the plywood with a chalk line.

I cut that off with the circular saw, and then did the final trimming on the table saw.

I cut it to length using the same setting on the mitre saw. Then sandwiched it all together using construction adhesive and 3 1/2" deck screws (I grabbed the wrong jar and dumped them before I realized in the first picture).


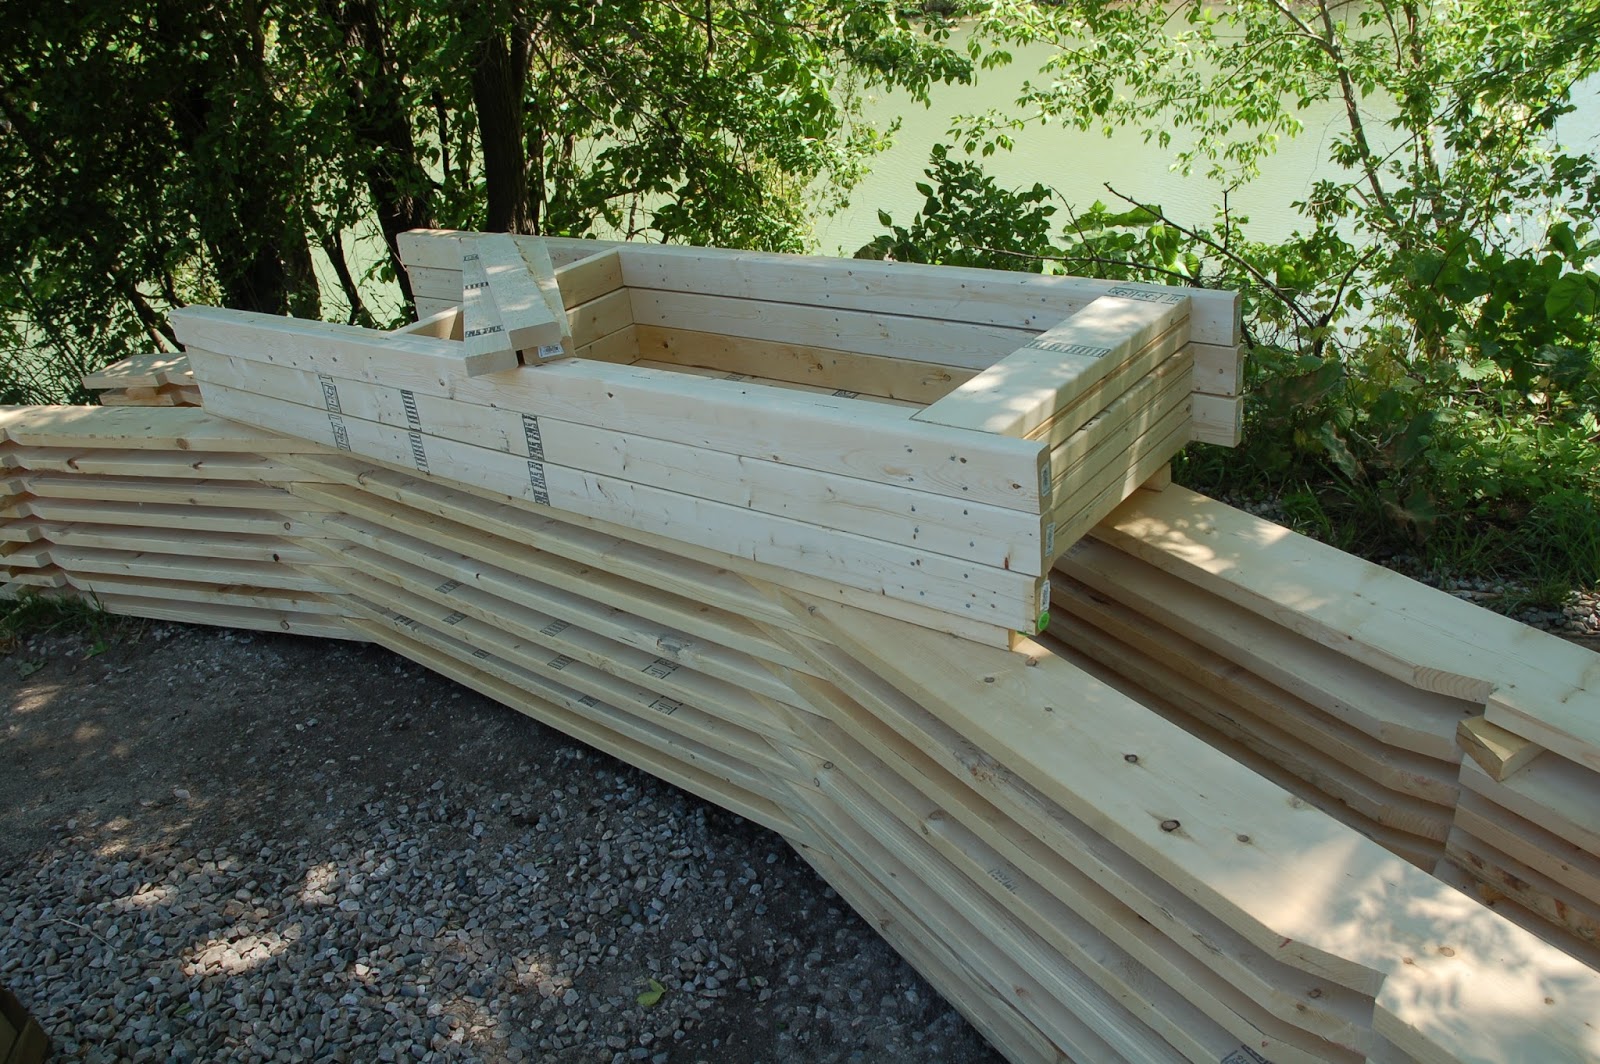
So now with all the pieces cut it is time to organise it...

then take the air nailer and assemble it


You can see that there is the extra short stud that will go into the 16" mark when it goes into the framing (a very short one will go above the header directly above too). Also on very left are the parts cut for the 4th window. These 3 that I have pre-assembled will go into the north 20' wall (looking out onto the river) and the 4th window will go into the east 12' wall (looking down the river). It may not seem logical to be putting most of the windows on the north wall, but I did it that way for two reasons. The first being the view, the second is that whenever you listen to artists and such talking about their studios, most are wanting the windows on the north side for the gentle indirect light that is nice to work by.
So now that these sub-assemblies are done, it is time to stack them so they are handy when the time comes to use them.

I went to Rona today and ordered the rest of the roofing material, and also some wood for the top and bottom plates of the walls which I forgot to do when ordering everything else, and some 5/4 x 6 PT deck boards for the fascia. It all ought to come tomorrow and wall framing can begin. I think I will lure some help in with the promise of free beer as working this hard is taking it's toll. I have also ordered a light scaffold that will come in handy for setting the rafters and doing ceiling work inside. I do believe I will just hire someone to sheath and shingle the roof. Ladders and I do not get along well together since I messed my knee up and I don't think I am capable of doing it.
I talked to my gas guy and he thinks he may have found a used tube type infra red heater that vents to the outside and has a sealed combustion chamber for a good deal. I also have to get an electrician involved at some point too. We will have walls soon, so until then...
Thanks for dropping by
No comments:
Post a Comment