Monday, April 27, 2015

That piece of walnut

So, what about that piece of walnut?


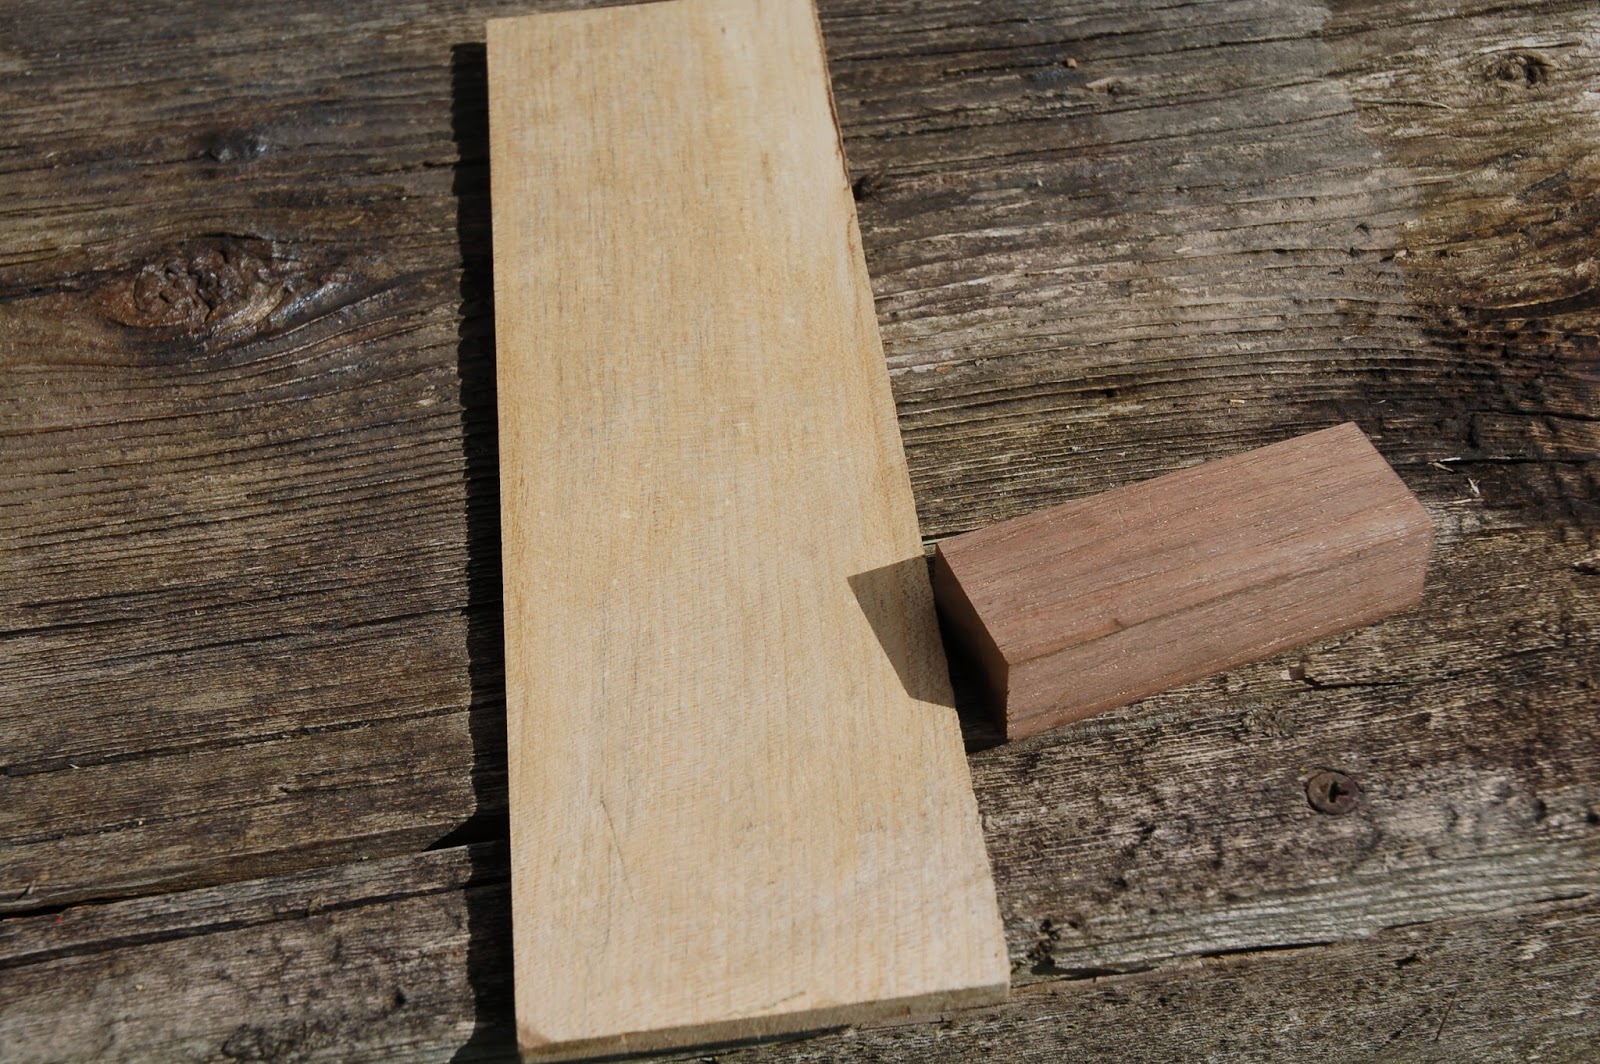
Time to make something of it.  It has some nice grain in it.  After it is taken to the drill press and a few holes put in it, there is some more form to it.


Some more work, by hand this time.  Mostly rasps and chisels.


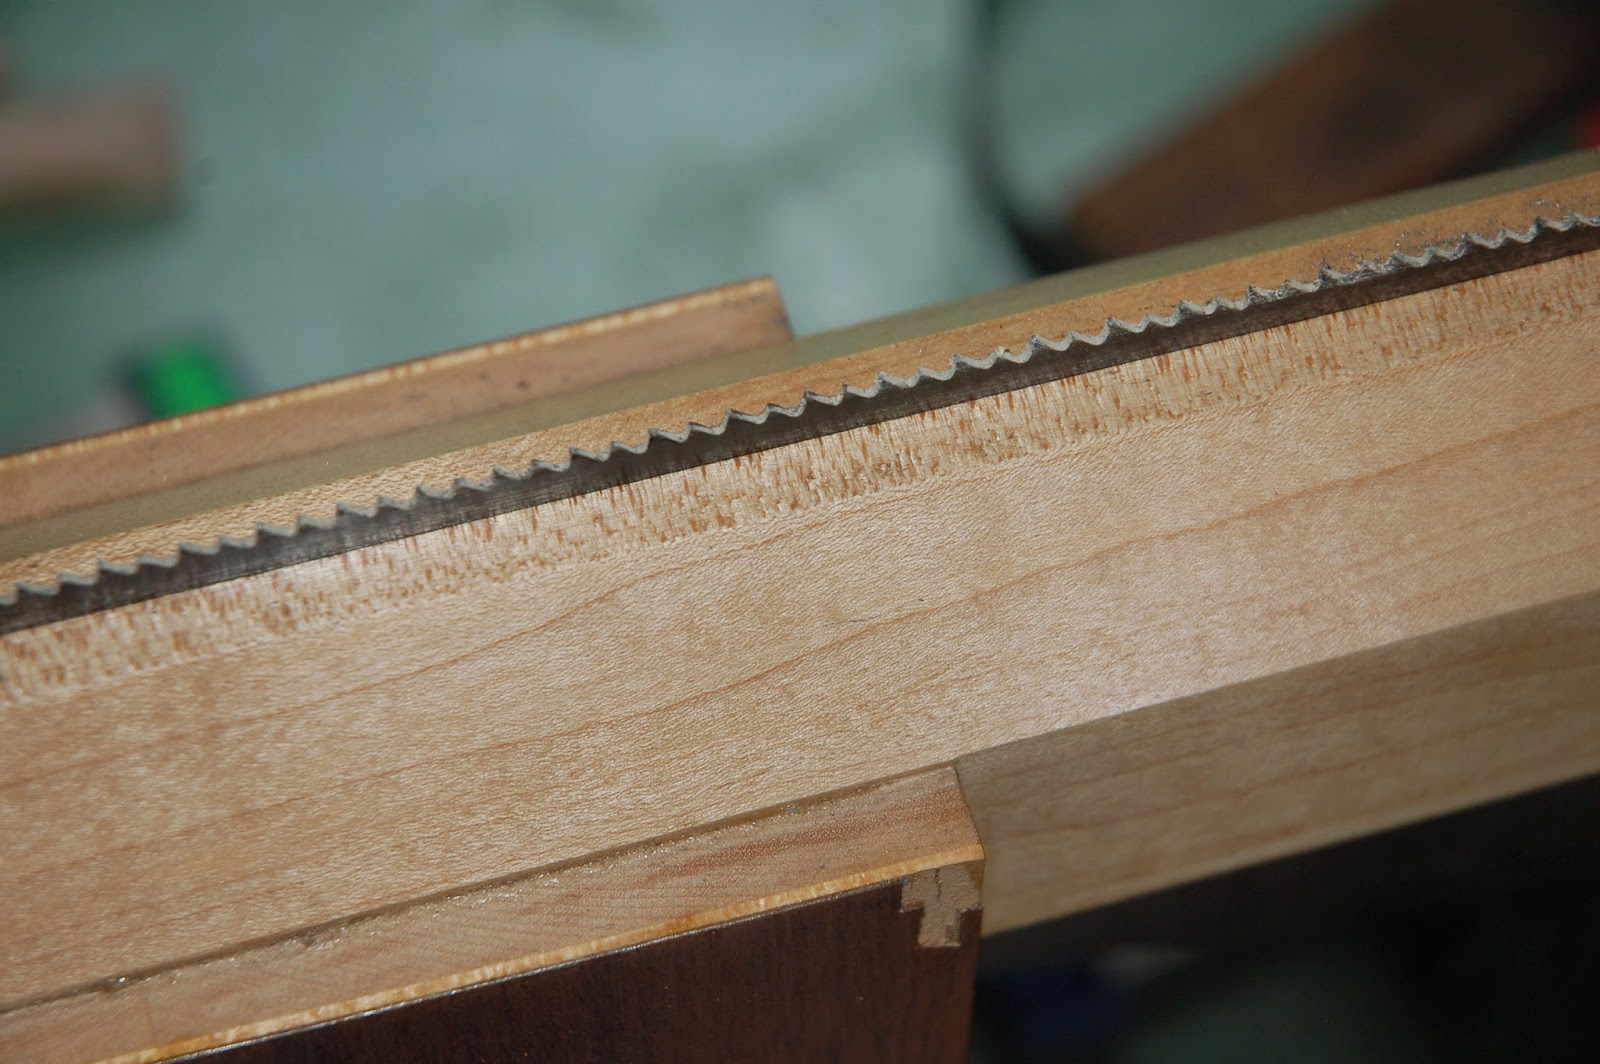
Totally inspired by Tom Fidgen of The Unplugged Woodshop I see a kerfing plane in this chunk of wood.  I am totally awestruck by Tom's work.  His skills and attention to detail are second to none.  I highly recommend his you tube channel if you enjoy wood work, or just enjoy beautiful things made from wood.

......and speaking of wood.


A truckload of slab wood helps keep warm over the winter.  That chunk of walnut came from last years load.  This year the load is made up of mostly maple.

Not all of it makes it to the burn pile though.


A nice selection of pieces catch my eye and get squirrelled away.  I have no idea what they will become, but they certainly are some thick slabs and a touch of spalting never hurts either.  Just sitting and drying will do for now.  

Back to some more shaping.


This is a long term project, still not finished as of writing this.  The walnut is working nicely and I am happy with the shape that is coming out of the wood.  I enjoy my little shop a lot.  I like fiddling around in there, but it is small and I have to keep it organized because, as it is, I have to move things around things to get anything done.


Time to take a pause and check out some yard sales.  I am beginning to worry about my recent desire to make and collect squares and measuring stuff.  One I bought cheap (and it is square)


Another inexpensive addition that will come in handy.


This grinder will work without an extension cord!  I have not found a place for it yet though.  It will go into the new shop for sure!  

Speaking of the new shop.  The town is OK with my plans.  That is great news, I was sure I would have to redo something on them.  The engineer is OK with everything though.  One more hurdle to cross though.  Because I live on the bank of the river (the Bayfield river), and our land is technically on a flood plain.  We are under the guidance of the Ausable-Bayfield Conservation Authority. So I need the go ahead from them too.  Which I am turning into a nervous wreck waiting for.  One thing in my favour with them is that the new shop is a replacement for the old shed.  Which is easier for approval than something totally new.  Still, my materials quote from Rona is only good for a couple more days, so I hope I hear soon so I can go order and pay for it.

When winter starts to come on, and it is cold and damp, it is not a good time for old iron.  One day you go out and you see the colour change and you know it is time for some 400 grit wet/dry sandpaper, lubricated with WD-40, and some elbow grease.


Get the metal all nice and clean, and then give the tools some protection for being put away for the winter.


I bring all of them in for the winter, safe from the elements and put away.  I think it makes the shed look a bit sad as compared to the previous pictures.


Just the old beater chisels and a few odds and ends for the occasional nice day that I can get out and do something.  I am looking forward to having a permanent place for all my stuff that is weatherproof.   I am also looking forward to a place I can be out of the weather and useful all year long.  The winters tend to get a bit long.


Well, I am going to leave you here for this week.  I hope you are enjoying the journey, there is more to come, so until next time......

Thanks for dropping in.

Monday, April 20, 2015

Summer Fun

Howdy

We are still getting through 2014.  Having gathered some walnut from the fire wood pile and finding a discarded T shirt with my late step sons picture on it (He was an Easter Seals "Timmy" and there was also a commemorative walk his sister organised to raise funds for the Easter Seals) in the rag bin, I decided to do a quick little surprise for Sally.  A small frame with the picture part of the T shirt in walnut with a maple base.  All finished in shellac.


Sally cried, so I guess it was a good gift.  

I needed to do little bit of maintenance on my guitar.  A bit of wear was showing on the frets, so I did a bit of re crowning to them.  I start by taping off the guitar where I am working and also making sure the magnetic pick ups are taped off to protect them from any errant metal dust and filings.


I work on the sides of the fret mostly in order to keep a nice crown on the fret.  I start with 400 grit paper and work through the grits all the way up to 2000 grit.  Then I give it a go with a bit of rubbing compound and a final polish with Nev-R-Dull, a cotton wadding treated with metal polish.


You can see better what we are getting rid of on the second fret.


One would tend to think that working on a guitar is relatively clean work.  One would be mistaken in that thought.


But after being done, cleaned up, and strung up with a new set of .011 - .050 GHS Boomers it looks really nice and feels wonderful.  I love being able to see the reflection of the strings in the frets!  


There's that piece of walnut again.  This time being used to check how the tune up went on the Stanley #7.


It is starting to look nicer than last time we saw it.  Plane seems to be working fine.

The idea came to me that I ought to have something to check how level frets are on guitars.  Stewart-MacDonald (a big on-line store full of cool stuff for working on guitars) has an item they call a "fret rocker".  It is simply a series of different length straight edges that you span 3 frets with, checking to make sure it does not rock back and forth.  This way you know that the middle fret of the 3 frets is not high.  You can work around the fret board with it and find high frets, then grind them down to level to make the guitar play nicer.  I don't have the money to buy one, but I do have a chunk of metal that is no longer good for it's original purpose.


Cutting it out with the Dremel took some time, but I cut it just slightly large and then worked the edges with sandpaper glued to a flat piece of granite tile I keep in the shop.


Now I have a nice set of short reference edges.  I really get a kick out of creating things out of discards sometimes.  The only thing is, this project has shown me that I ought to keep hold of things as "I could use that someday" always springs to mind.  I still have the rest of that old saw blade.

Oh, and I will leave you with a little tip.  Get yourself a granite tile.  A nice flat one (check with a straight edge in the store......yes they will look at you funny).  You only need one, it comes in so handy with sandpaper glued to it (easy releasing craft glue).  Also.....keep the cardboard envelopes that your sand paper comes in.  It is good for storing sand paper in (who'da thunk it?).  If not that, then those cardboard file folder things for the filing cabinet.  Get one for each grit, stack it back to front in the cardboard, so you can see what grit it is (or mark it on), put it on a flat surface (like a solid shelf) and store your granite tile on top of it.  It keeps your sand paper from going all funny with wrinkled edges and brittle backing for a long time.  I use Norton paper mostly, it is available at my local NAPA auto parts store and is good paper.  It is not the only good paper, 3M and Klingspore are a couple of others I have used, both good.  I use what I can source locally for the most part. 

So, until next time.  Thanks for dropping in!

Thursday, April 16, 2015

Accessories for the saw bench

Hi again, it has been a short time.  Thanks to Lee Valley and prompt shipping I have another entry to make.  I think it was Tuesday evening I went online and ordered my hold fasts and here it is only Thursday and they arrived.


Two genuine, made in the USA, Gramercy hold fasts.  Now to make them work with the saw bench I broke out the brace and bit and did a boring job.


Before breaking through I clamped a piece of scrap 2x4 to the underside to prevent it from blowing out.  Then I checked it out.


Seems to work just fine! 

Another thing that I have seen on some saw benches was some sort of fence so that a bench hook is not needed.  I think that could come in handy, so I went to the cut off box and picked a suitable piece and cut it to length.  Then clamped it to the underside of the saw bench and marked the hole locations with the same bit.  Then I bored the holes and cut a couple of short lengths off a length of 3/4" dowel I have.


The bench hook in the picture is one I copied off an episode of The Woodwrights Shop.  Roy Underhill is amazing.  If you like wood working, you probably have heard of him. 

Next job was to take the short dowels and glue them into the new holes.


Then check for fit.  I didn't put it all the way in as the glue is still wet.


So there it is, the new saw bench complete with accessories.


In other news, I dropped in at the town office and the permit application has not been gone through yet.  The engineer who usually does it is off on a medical leave for a year.  He is a really nice guy who has helped me a few times with advice.  His replacement, I suspect, is filling in as his time allows, so he is very busy.  You have to consider the time of year and the amount of applications he has to wade through.  Probably in 2 different town offices now.  It is on his desk and I was told to check in Monday to see if everything is OK.  No real hurry other than my chomping at the bit to go.  I have to do some levelling and have to get a load of gravel in too, so there is a couple of weeks worth of work right there.  I have also decided to buy an air powered framing nailer this weekend.  Just an inexpensive one, but it will save my arm a lot of wear and tear. 

 So, until next time, thanks for dropping in!

Tuesday, April 14, 2015

The Dynamic Duo!

Another nice day out and I got everything on the saw bench glued up and clamped this morning.  I took it out of the clamps this afternoon and cut the legs to length and did a bit of clean up and I am very pleased.  It only took a couple of swipes with the block plane on to get all the legs the same length.  I did a bit of chamfering as well while I had the block plane out.  I only have to bore a couple of holes in the top for the hold fasts which I will be ordering from Lee Valley tonight.  The have free shipping right now on orders over $40 and 2 Gramercy hold fasts are $41 and change plus tax.  I am thinking if I put the holes in the right place they would be useful for mounting a fence/planing stop type of thing along 1 long edge also.

So without further ado....here is my latest build, along with it's split style sidekick that I made previously.


Ready for action, and it will start seeing it soon.

  I was at Rona today and I was looking at a framing nailer.  I think I am going to spring for it as there will be a lot of nails to put into building the shop and I am going to be working pretty much alone.  The other alternative is swinging the big Estwing framing hammer for hours.  Besides, who can resist buying a new tool, especially one as cool as one that can shoot nails.  Now it is time to log in to Lee Valley and order the hold fasts.  Thanks for dropping in!

Monday, April 13, 2015

I surprised myself

I went out this morning, encouraged by the progress I made on the saw bench yesterday.  I finished up the short stretchers and got all the mortices and tenons cut.  So I decided to go with a single long stretcher in the middle with a tenon into the short stretchers.  I had to cut that twice.  I messed up the first one, good thing I had an extra piece the right size on hand.  I had originally planned on 2 long stretchers.  So the second long stretcher worked out after some fiddling with it.  I have a love hate relationship with my Stanley 192 shoulder plane.  When you  get it set, it is OK, but getting it there is quite the chore.  I am thinking that this plane is not a keeper.

Anyway, the weather is coming in.  April showers and all that, but it is warm and I have all my joinery done.  The only thing left to do is to cut all the legs to length, and that is just as easily done after assembly.  So I glued up the leg assembly!  I fits together pretty well and is sitting in the mortices in the top unglued.


Coming together a little quicker than I expected, and that is a good thing!  I will enjoy having 2 of these benches when I start working on the 6 x 6 pressure treated timbers that the shop will sit on.

Until next time, thanks for dropping in!

Sunday, April 12, 2015

Saws, squares, and some current happenings.

Oh my, what a beautiful day out today!  I tired myself out.  I have the position of the shop pretty much nailed down now.  Friday I put in the paper work for the building permit.  Small town living, the guy was out and will get to it next week.  No hurry, there are a lot of things to do before nails start getting pounded in.  I have 2 quotes in now for the building material and I am going with our local Rona store for my supplies.  Also today I got out to the shed and grabbed the old chisels that are sitting in there and chopped a couple of mortices and cut a couple of tenons for the new saw bench.  I am really happy with how it turned out.  These are pretty much my first mortice and tenon joints by hand and relative dimensioning.  I had one for the top a bit loose, so I glued a shim on it and did a bit of chisel work and it fits fine now.  So, I decided to do a short stretcher for the legs.


To get the location of the stretcher I just made it 4 widths of the stretcher down.  I carefully marked out the mortice with a double pin marking guage set to my 1/2" chisel.  The same guage marked the tenon from the same side face.  


The brace in the photo was not used.....it just has not been put away yet.....tsk tsk!

But the joinery all worked out OK!  The whole end assembly together....


The top to leg joint, the one on the left is the one I had to fix.


The legs with the short stretcher.


It is far from perfect, but perfectly fine for shop furniture.  Great practice too.  There has been very little measuring on this piece and I don't think there are two pieces of wood the same size or perfectly square.  Everything is pretty much dimensioned from what has already been done, and it is all left over construction material.  

So I left you last time with some saw stories.  I found a few more pictures of my saws that I converted to rip pattern.  


That piece of maple I used for the saw vice jaws is a nice looking piece of wood.  The saws perform pretty well as you can see how thin a slice I can rip.  I paid $2.00 for 4 saws, and these are the two without the Disston Buttons.


I also improved my bench vice's functionality by boring a couple of dog holes and making a planing stop to fit to them.  


......and that piece of walnut?


THAT piece of walnut?....  That piece of walnut is a long term project that I will get into as we go along.  It is still under construction.  Instead I will show you some smaller pieces of walnut and a beautiful piece of maple like this.


A project of precision.  I am making a couple of squares.  I cut a bridle joint in the walnut and slipped in the maple after it was dressed square.  To ensure accuracy I took a straight edge and kept drawing lines and then checking with the square turned over.  When the blade of the square lined up with the handle either way, I knew that was the line to use.


You can see it took a few lines to get one that was truly square.  I then glued it up and put it in the vice.....checking with my reference line of course.


I made a pair of them.


After a bit more work and some shellac.


Both sides of the blades are square to the body and they are wonderful and light to hold and handle.  I truly treasure these little squares.  I have used these photos in a few other places.  Something about the shine and accuracy of the squares against the rough beaten yard sale find bench.

I hope you enjoyed this little tour.  I am working two time lines.....getting up to date and what is current.  I at least hope you are finding a bit of entertainment in my story.  Again and as always.  Thank you so much for dropping by!