Monday, April 13, 2015

I surprised myself

I went out this morning, encouraged by the progress I made on the saw bench yesterday.  I finished up the short stretchers and got all the mortices and tenons cut.  So I decided to go with a single long stretcher in the middle with a tenon into the short stretchers.  I had to cut that twice.  I messed up the first one, good thing I had an extra piece the right size on hand.  I had originally planned on 2 long stretchers.  So the second long stretcher worked out after some fiddling with it.  I have a love hate relationship with my Stanley 192 shoulder plane.  When you  get it set, it is OK, but getting it there is quite the chore.  I am thinking that this plane is not a keeper.

Anyway, the weather is coming in.  April showers and all that, but it is warm and I have all my joinery done.  The only thing left to do is to cut all the legs to length, and that is just as easily done after assembly.  So I glued up the leg assembly!  I fits together pretty well and is sitting in the mortices in the top unglued.


Coming together a little quicker than I expected, and that is a good thing!  I will enjoy having 2 of these benches when I start working on the 6 x 6 pressure treated timbers that the shop will sit on.

Until next time, thanks for dropping in!

Sunday, April 12, 2015

Saws, squares, and some current happenings.

Oh my, what a beautiful day out today!  I tired myself out.  I have the position of the shop pretty much nailed down now.  Friday I put in the paper work for the building permit.  Small town living, the guy was out and will get to it next week.  No hurry, there are a lot of things to do before nails start getting pounded in.  I have 2 quotes in now for the building material and I am going with our local Rona store for my supplies.  Also today I got out to the shed and grabbed the old chisels that are sitting in there and chopped a couple of mortices and cut a couple of tenons for the new saw bench.  I am really happy with how it turned out.  These are pretty much my first mortice and tenon joints by hand and relative dimensioning.  I had one for the top a bit loose, so I glued a shim on it and did a bit of chisel work and it fits fine now.  So, I decided to do a short stretcher for the legs.


To get the location of the stretcher I just made it 4 widths of the stretcher down.  I carefully marked out the mortice with a double pin marking guage set to my 1/2" chisel.  The same guage marked the tenon from the same side face.  


The brace in the photo was not used.....it just has not been put away yet.....tsk tsk!

But the joinery all worked out OK!  The whole end assembly together....


The top to leg joint, the one on the left is the one I had to fix.


The legs with the short stretcher.


It is far from perfect, but perfectly fine for shop furniture.  Great practice too.  There has been very little measuring on this piece and I don't think there are two pieces of wood the same size or perfectly square.  Everything is pretty much dimensioned from what has already been done, and it is all left over construction material.  

So I left you last time with some saw stories.  I found a few more pictures of my saws that I converted to rip pattern.  


That piece of maple I used for the saw vice jaws is a nice looking piece of wood.  The saws perform pretty well as you can see how thin a slice I can rip.  I paid $2.00 for 4 saws, and these are the two without the Disston Buttons.


I also improved my bench vice's functionality by boring a couple of dog holes and making a planing stop to fit to them.  


......and that piece of walnut?


THAT piece of walnut?....  That piece of walnut is a long term project that I will get into as we go along.  It is still under construction.  Instead I will show you some smaller pieces of walnut and a beautiful piece of maple like this.


A project of precision.  I am making a couple of squares.  I cut a bridle joint in the walnut and slipped in the maple after it was dressed square.  To ensure accuracy I took a straight edge and kept drawing lines and then checking with the square turned over.  When the blade of the square lined up with the handle either way, I knew that was the line to use.


You can see it took a few lines to get one that was truly square.  I then glued it up and put it in the vice.....checking with my reference line of course.


I made a pair of them.


After a bit more work and some shellac.


Both sides of the blades are square to the body and they are wonderful and light to hold and handle.  I truly treasure these little squares.  I have used these photos in a few other places.  Something about the shine and accuracy of the squares against the rough beaten yard sale find bench.

I hope you enjoyed this little tour.  I am working two time lines.....getting up to date and what is current.  I at least hope you are finding a bit of entertainment in my story.  Again and as always.  Thank you so much for dropping by!

Tuesday, April 07, 2015

Shop? tour

Well hello there.

I am a bit late this week posting.  Spring cleaning, or what ever you call what we are doing......decorating/painting, is still going on and I am really sore, so bear with me.

We went to a home and garden show and I met a guy who makes mini barns.  I asked for a quote for the size of shop I want to build, and it came to about $7000.  I didn't think that was too bad, but then someone pointed out that it was over $21/sq ft.  so I thought some more.  I would still have to build the base for it too.  I got a material quote in for the building material today from our local Rona store.  It came out to just under $3750.  I don't think I want to pay $3000 in labour on top of having to build the base, so we are back on the self build track.  I now have 4 little flags on my lawn marking the corners of where the new shop will be.  It may move a little but there is still lots of time before the frost is out of the ground and I can level the area.  I have the money all tied up for a while yet anyway, and have to put in the papers for the building permit.

Getting back to where we left 2014.

I did a few quick modifications to the table saw.  I added some drawers I made from scraps and an outfeed table to it.  I also made a new panel sled and a mitre sled.  Now everything that belongs with the saw is with it.  I still need a new saw, and if there is money left at the end of the shop build I am going shopping for one.  But for now this is what I have.


The mitre sled is copied from one Steve Ramsey made over at Woodworking for Mere Mortals ,  Steve has an excellent You Tube channel filled with free content and projects that are creative and fun.  I would say he has one of the best channels on You Tube.  Actually, there are a couple of them now, he does short videos called "Mere Minutes" too.  Anyway, the sled works well and sits in the bottom left cubby on the saw.  The panel sled on the right cubby is large but light.  Just a piece of 1/4" ply with a runner and a fence.  Pretty accurate with a 5 cut check. 

What have I been working out of up until now?  Well, most of the work gets done on the lawn.  That kind of limits me to working on nice days.  The indoor space is this.


That's it!  A leaky old garden shed that was here when we moved in.  Tight quarters indeed.  A lot of my tools stay in the house, and most of them go in with the finishes and glue all winter.  My shop time is very limited, but I enjoy what I can.  I have picked up bits and pieces over the years as my interest grew and now it is time for a big step and commitment.  I will be nice being organized and not having to move things to get at what I want, then moving it all back after I get it so I can go back to work.  

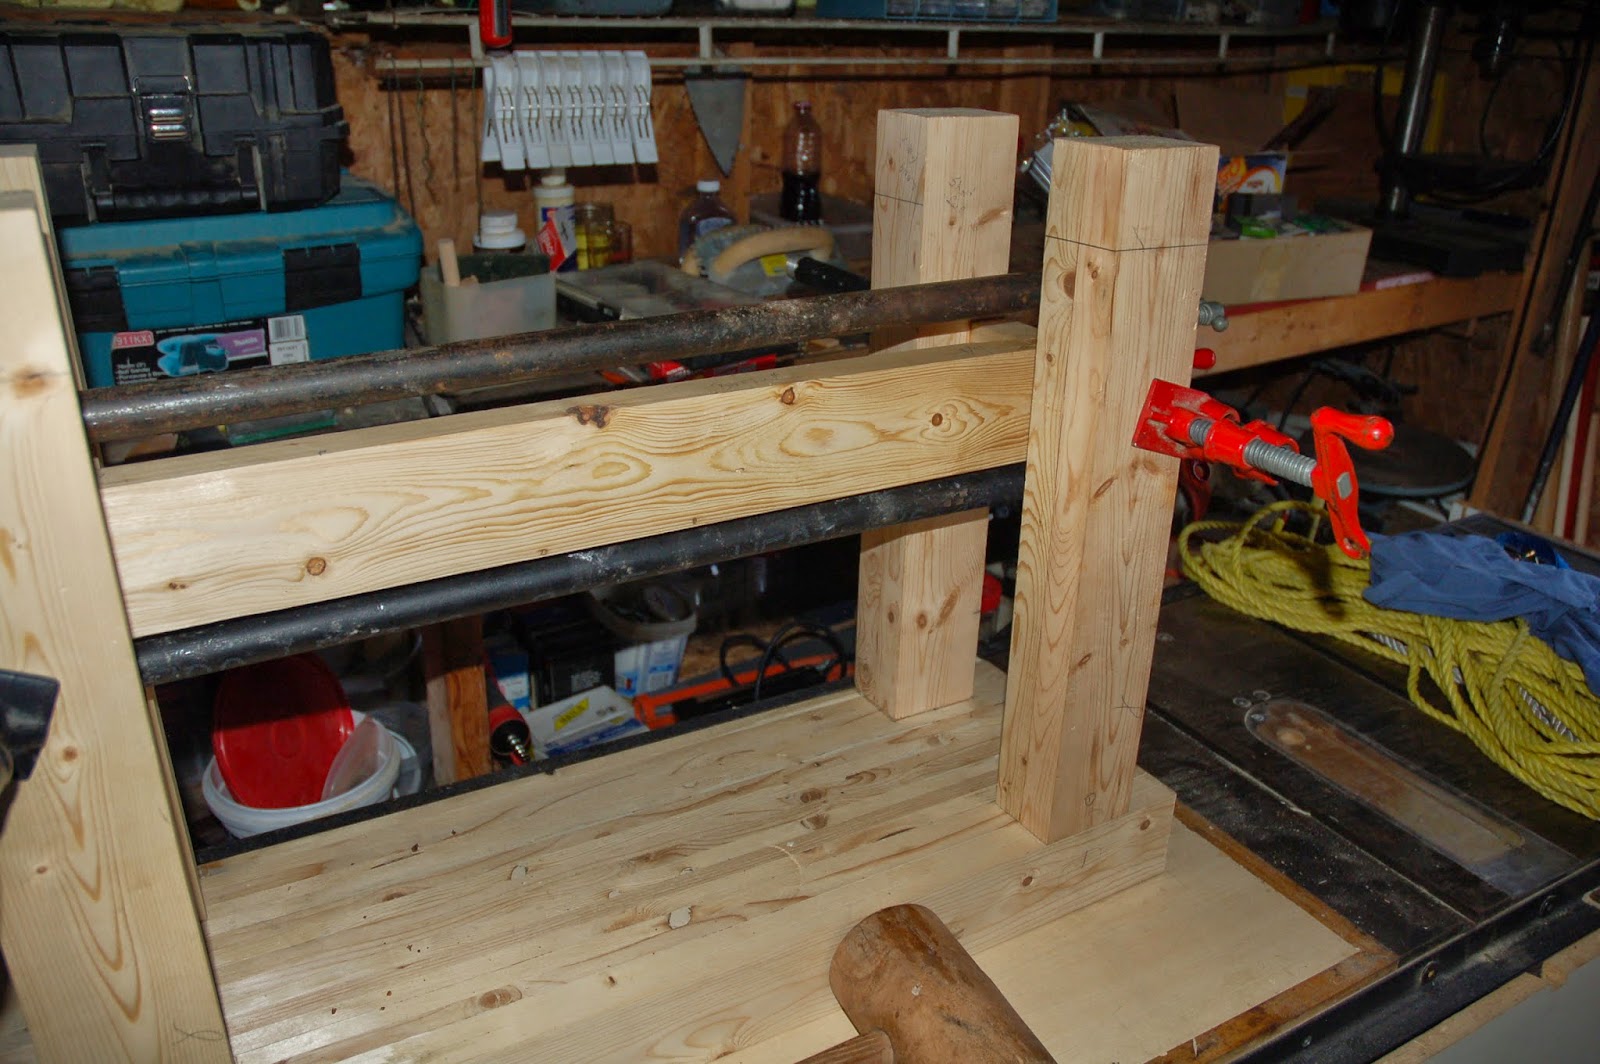
Every year towns around here have town wide yard sales.  If you look closely at the pictures you will see 5 hand saws hanging on the left side of the shop.  One I bought at Canadian Tire and is a Stanley hard point saw.  A decent enough saw, but they are not meant to be re sharpened.  The other 4 I bought at the Hensall town yard sale for $2....yes two dollars.  Two of them are Disston D-8's.  I figured for the price, they are just right to learn sharpening on.  First, of course, I need a way to hold them, so I cut up some maple and used a discarded leaf from the kitchen table (remember the table I re finished?) and cobbled together a saw vice.  


It just clamps in my bench vice and the works well.  I have since shortened it in height a bit so I can sit and sharpen.  Not bad for some scraps.


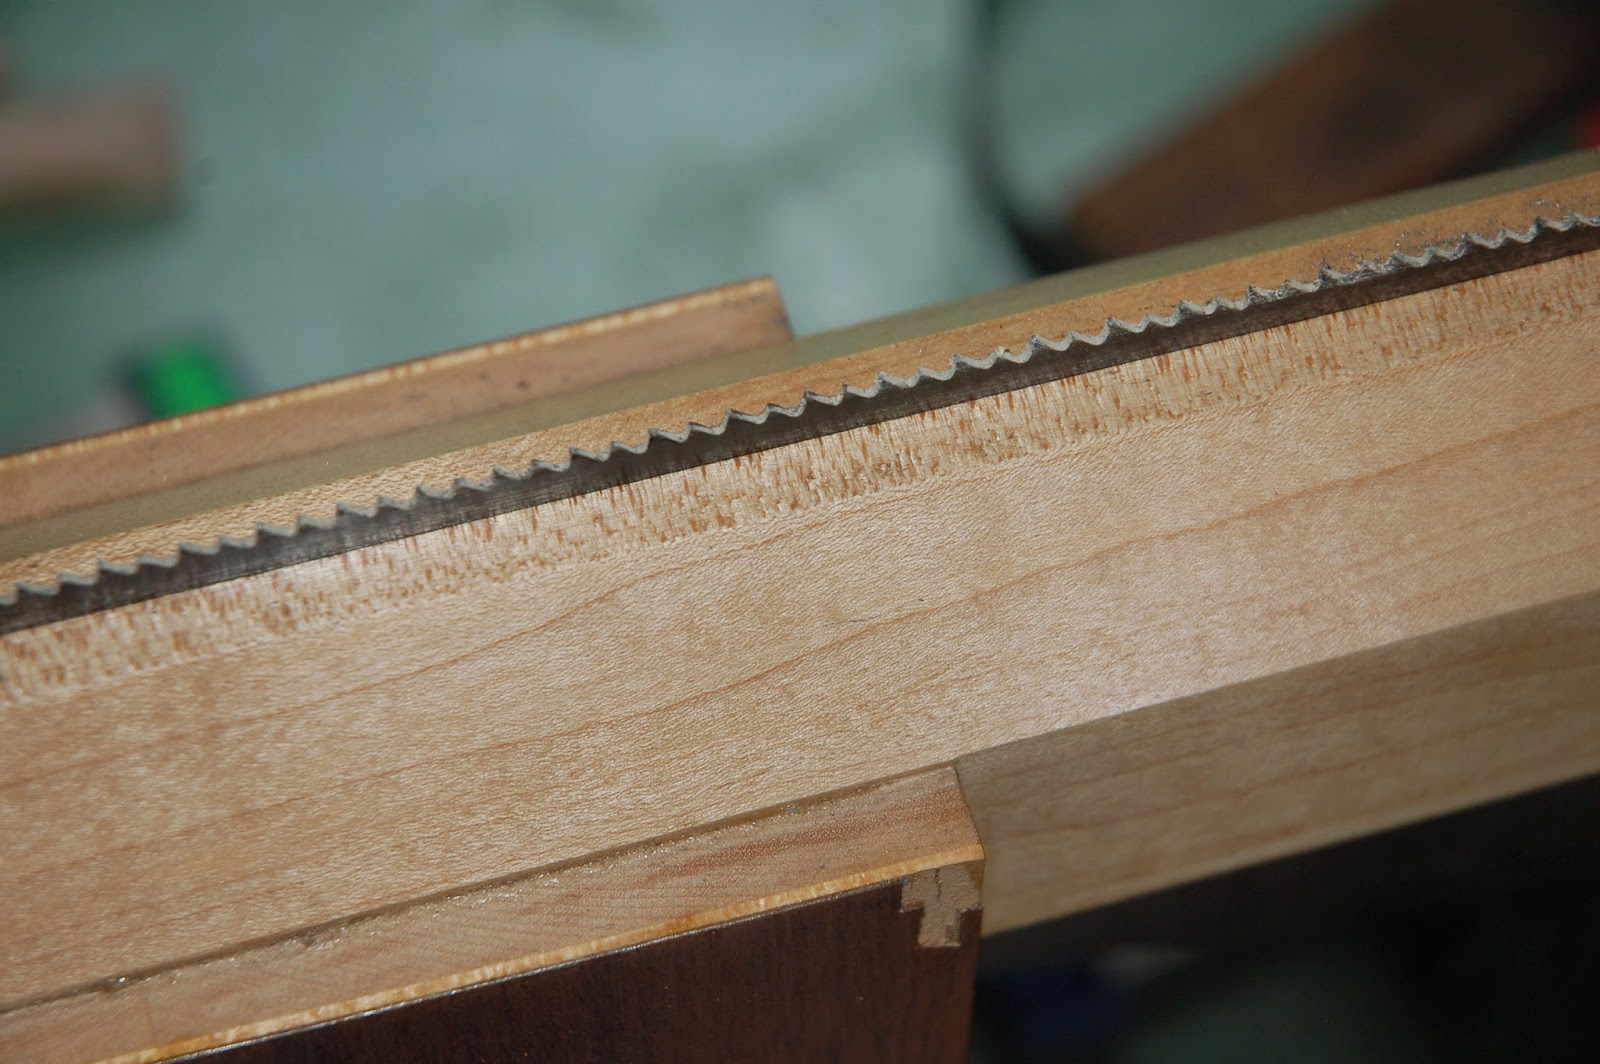
I bought the proper sized files from the local Home Hardware, did a bunch of reading, asked a bunch of questions of RogerT at The Woodwhisperer live IRC chat and restored the saws.  The 2 Disston's were kept cross cut and the other 2 I re filed rip.  I may yet retooth one of the rip saws coarser.  At 7 TPI (or is that PPI?  I can never keep that straight), it takes some time getting through a piece of wood, but they all cut reasonably well now.  I already had a saw set that I bought at a flea market on Manitoulin Island, so now I can maintain my hand saws.  They go nicely with the saw bench that lives under the work bench, and a lot of times it is much easier to pull that out rather than set up a power tool.  I have a Ryoba that I bought at Lee Valley, but I cannot cut worth a damn on a pull saw.  Some folks have great luck with them, I just don't have the touch I guess.

Oh, and what is a post without critters in the yard!  We have these two guys on pest control in the wood pile.  


Mama ground hog taking care of her babies and controlling the dandelions.


Lil' Lee is growing too.


That is one happy puppy.  Now it is time for me to take a break.  Thanks for dropping by!